

As I’ve been continuing with my “Gray’s Anatomy” project, I’ve found it increasingly difficult to actually take the photographs I need to match figures from the book because to frame them properly I need to stand further than an arms reach from the camera. To overcome this I obviously needed a remote of some kind.
Official Polaroid remote cables show up on eBay from time to time, but they always seem to edge up beyond what I have been willing to pay. So I decided I’d try and make one. As far as I could tell from the photos I’d seen and from a little bit of reading around, the SX-70 shutter release is a simple electrical contact switch – you press the button and complete a circuit for as long as it takes to expose and eject the film. So I figured it should be reasonably simple to put something together, I’d just need a suitable switch, some wire and a way of connecting with the socket on the camera itself.
In the end I only needed three things:
- A push button from a doorbell.
- A spare length of wire from some IKEA LED strip lights.
- Some sugru.
The doorbell push shouldn’t need too much introduction. You push the button and one strip of metal contacts another to complete a circuit. The wire was surplus from a DIODER set which I used as under-cupboard lighting, using only the short connecters in the box. The sugru may need some more explanation – it’s a self-curing rubber that bonds to just about anything. It comes in small packets and when opened is easily moulded by hand to fit just about any shape, but sets permanently in 24 hours, however it remains slightly flexible and can easily be cut or trimmed.

The main problem to overcome is connecting to the camera. The socket on the camera looks like this:

– just a pair of holes on the side of the unfolded camera. It’s not easy to see exactly what is inside at this point, and just poking a bit of wire in isn’t the best solution. However, the spare IKEA wire has proper connectors with crimped on springy contacts. By removing the contacts from the plastic connector we have something much more suitable for poking into a camera.

It turns out that when just removed from the connector the spring contacts are too fat to fit into the socket, so I unrolled them which made them both thin enough to fit, and slightly longer. A quick test showed that with these contacts pushed firmly in to the socket, touching the other ends of the wires together fired the shutter.
In principle that might have been enough – just push the wires in and connect the other end to the bell push for a remote – but I wanted something a little less fiddly. This is where the sugru comes in. I used it to mould a plug around the wires so that I could more easily connect them up. Now I didn’t want the sugru to bond with the camera since I want to be able to remove the cable release and shut the camera, so I put a piece of magic tape over the socket, and then pushed the contacts through.

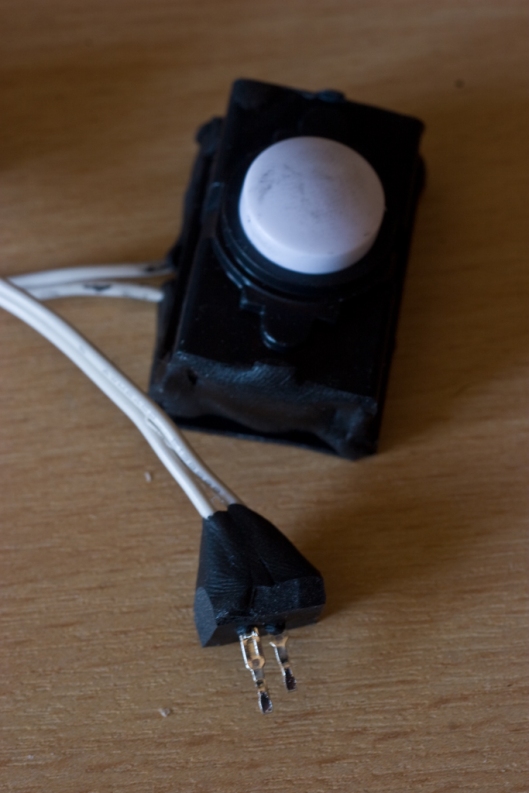
Once they were firmly seated (and I tested the shutter release would fire) I used about half a sachet of sugru to mould around the wires, making sure to get it flat against the camera and well between the wires so that they would be securely held. I used the rest of the sugru to seal up the bell push using a bit of plastic cut from an empty film pack. I then left it overnight to cure properly.
After 24 hours it was properly set and I was able to lift it off the camera by peeling the tape, and then pulling the tape off the new plug. Using a craft knife I tidied up the edges a bit, and there we have a functioning SX-70 cable release.

Pingback: La ‘Roid Week e un cavo di scatto remoto DIY da testare | Holga My Dear